Last week we gave 3 tips for beginners keying in Nuke. This week we are following that article up with 2 more great tips!
There are few symbols more synonymous with visual effects than the classic chroma key green screen. As such, one of the major tools in every compositor’s box is a solid understanding of keying. In the foundry’s Nuke, this process can be incredibly complex.
In part 1 of Beginner Tips for Keying in Nuke, we discussed both fundamental concepts and technical approaches to up your keying game. With so many aspects to consider, these tips can act as lily pads to help beginners navigate the vast waters of keying—from footage acquisition to final export. Here are even more beginner tips for Keying in Nuke.
Keep your A from your RGB
One of the important things to understand when working Nuke is that you’re changing your footage with every operation you perform. Think of each node as a machine which takes data (the information from all the channels stored in the pipe), performs an action to it (this is where the math and code comes in), and then spits it out the other side.
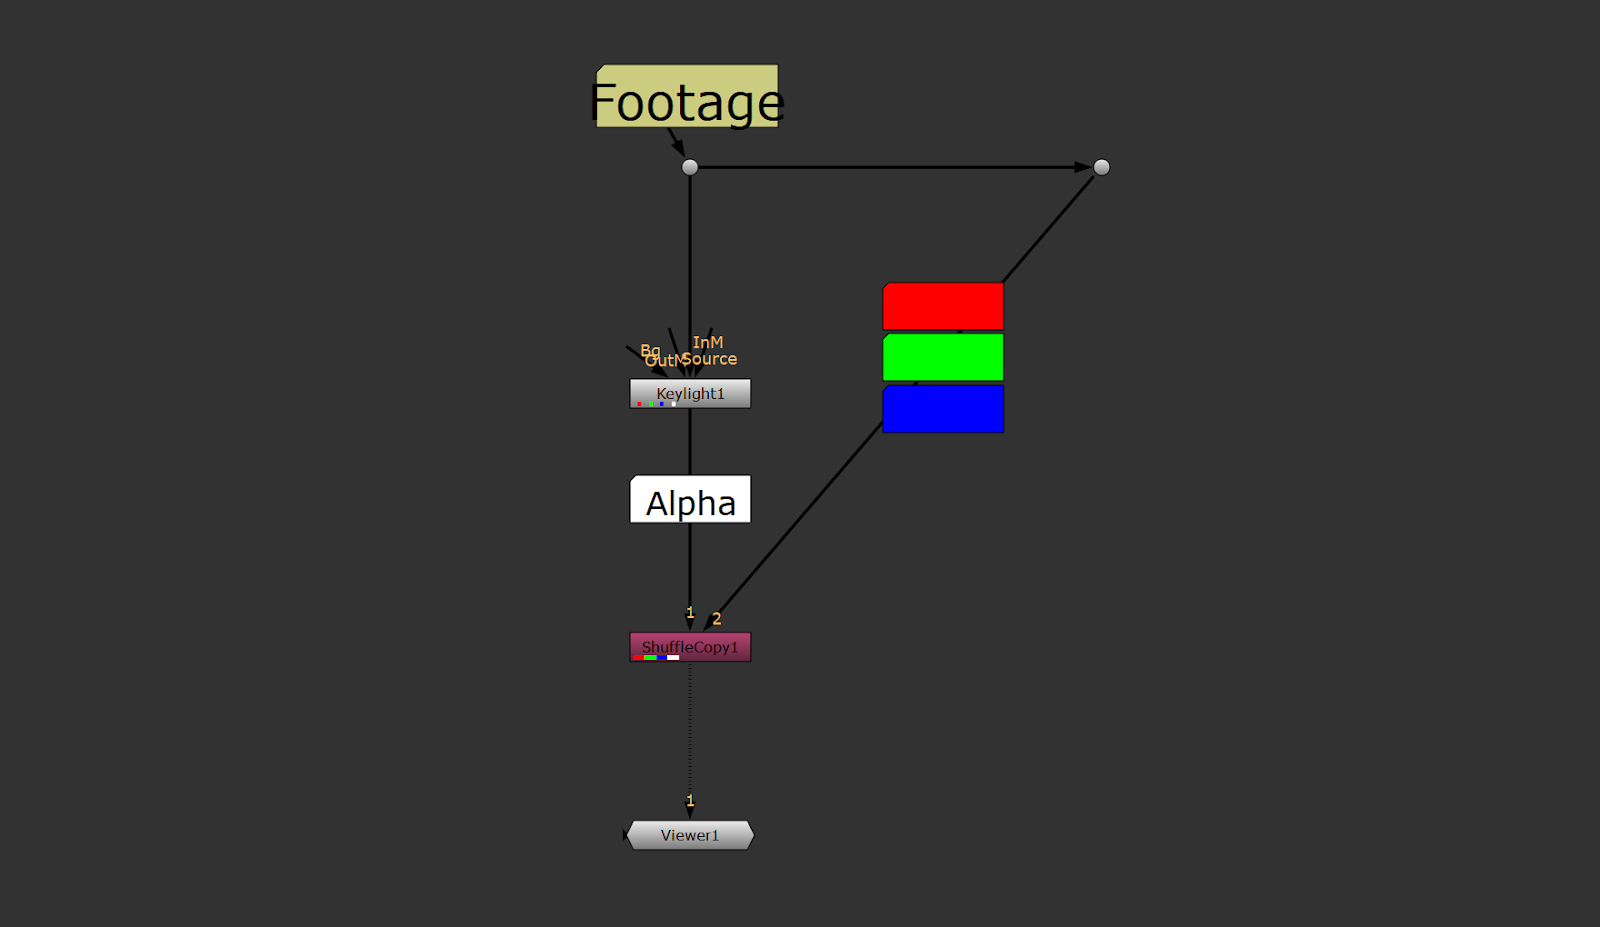
This may seem overly fundamental, but it’s crucial to understanding the why behind certain workflows and processes inside of Nuke. For keying, it informs why you should always keep your alpha and your color separated. This means that you should always retain a pipeline with RGB channels from your original footage which haven’t been touched by the process of pulling your matte.This structure shows a (very) simplified version of this concept. As you see, the alpha which is created in Keylight is then applied to the color data taken directly from the footage. This ensures that your RGB channels are untouched by the keying process and that your alpha isn’t affected by any color operations either.
Don’t forget about Despill
Keying is a multistep process. The primary portion of it and the one that people most commonly conflate with keying as a whole is pulling your alpha. This is of course when you remove the foreground from the background for use later (usually with a new background). However, several detailed and intricate measures must be taken to create a convincing composition from keyable footage.
Despill is one of these steps which is often hacked off the end of a hobbyist’s keying workflow. This step is necessary because of the nature of light itself. The only way you can see a green screen is because the light within the green wavelengths is traveling to your eye. If it’s traveling to your eye it must also be traveling through your characters hair, onto their skin, and across their clothing, right? There are many ways to despill your footage and get rid of this problem, but the most simple come in two forms.
First, there are despill tools which are built into the common keyers. In primatte, for example, the spill sponge is a tool which tries to remove spill from a sampled area according to your background color. Keylight offers a more simple trick for a quick and dirty despill. Set the channel value to "1" for the color of your background. In the case of a green screen, you will see that the node lowers the green values throughout your scene—usually leaving you with a reddish brown background. Be careful! Use this sparingly as it will affect all the colors in your shot.
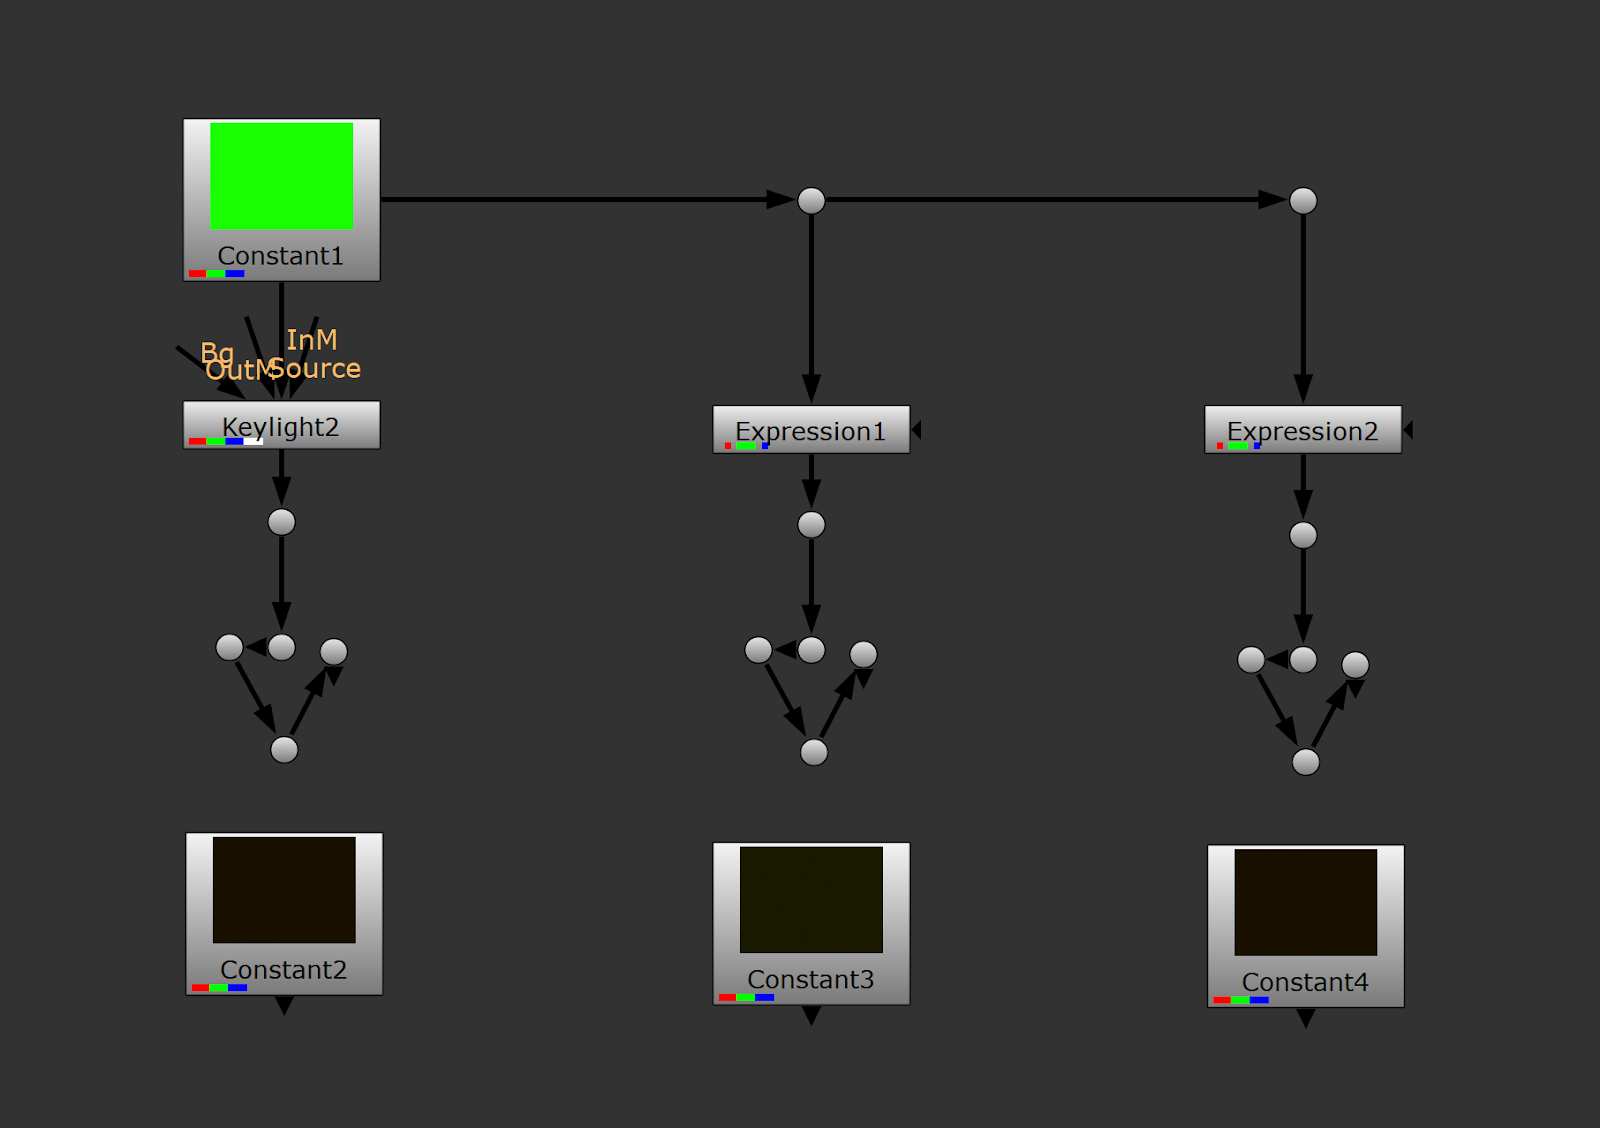
Second, there are basic despill expressions which can be used to dampen the values in the channel respective to your background. The two common despill expressions are g > r ? r : g, and g > (r+b)/2 ? (r+b)/2 : g. In the first expression, if the green value is greater than the red, then the value of green is set to the value of red. In the second expression, if the green value is greater than the average of red and blue, then it is set to the average of red and blue.
These expressions work similarly to any other despill method but allow you a look under the hood to really understand the goal of a lot of despill tools and techniques. Below you can see the resulting color of a feux green screen with an RGB value of 0.01,1,0 run through Keylight with green channel set to 1 along with the two despill expressions. Consider how this would translate to a real world situation with green values spilling onto a brown shirt. As with everything you do in Nuke, always try to unveil both the why and the how. The math may not be as exciting as comping an epic scene or explosions, but you should treat your color values like children. Learn where they’re going and what changes are happening to them as they run through your node graph—connect your viewer to any point in your comp and control click for a look inside!
First time here? ActionVFX creates action stock footage for VFX and filmmaking. (We also have some great free stuff!)
Remember to connect with us on our social networks to stay updated on our latest news, giveaways, announcements and more!